

Homes built in Citrus Heights between the 1940s and 1970s carry decades of history, and electrical systems designed for a completely different era. A home wired for 60-amp service in 1965 wasn’t built to handle smart home devices, electric vehicle chargers, or the power demands of modern kitchens. The result? Overloaded circuits, fire hazards, and frustrated homeowners.
According to the National Fire Protection Association, electrical failures or malfunctions accounted for an estimated 13% of home structure fires between 2015 and 2019. In older homes, this risk is even higher due to deteriorating insulation, outdated electrical panels and wiring, and limited load capacity.
Our professional electrical troubleshooting for old homes doesn’t just fix immediate problems; it uncovers hidden risks before they become emergencies. This guide covers everything homeowners need to know to diagnose, repair, and upgrade electrical systems in vintage properties.
Warning Signs You Shouldn’t Ignore
- Lights flicker when appliances turn on
- Circuit breakers tripping repeatedly
- Warm or discolored outlet covers
- Burning odors with no visible source
- Sparks when plugging in devices
- Dead outlets in multiple rooms
- Buzzing sounds from electrical panels
Any of these symptoms indicates your electrical system needs immediate professional evaluation.
Understanding Electrical Systems in Mid-Century Homes

Original Design Limitations
Most Citrus Heights neighborhoods developed during the post-war building boom (1945-1975) feature electrical systems with these original specifications:
| Era Built | Typical Service | Average Outlets per Room | Common Panel Types |
|---|---|---|---|
| 1940s-1950s | 60-amp | 1-2 | Fuse boxes |
| 1960s-1970s | 100-amp | 2-3 | Federal Pacific, Zinsco |
| Modern Standard | 200-amp | 6-8 | AFCI/GFCI equipped |
Today’s households typically require 150-200 amps to safely operate HVAC systems, kitchen appliances, home offices, and electric vehicle charging stations. The gap between original capacity and current demand creates constant system stress.
Missing Safety Features in Vintage Wiring
Pre-1970s electrical installations lack modern protective devices now required by California electrical code:
Ground Fault Circuit Interrupters (GFCIs) – Required in wet areas since 1973, these devices prevent electrocution by detecting current imbalances and cutting power in milliseconds.
Arc Fault Circuit Interrupters (AFCIs) – Mandated in living areas since 1999, AFCIs detect dangerous electrical arcing that can ignite fires inside walls.
Proper grounding systems – Many older homes use two-prong outlets without equipment grounding conductors, leaving no safe path for fault currents.
Whole-home surge protection – Not available when most vintage homes were built, this technology protects sensitive electronics from voltage spikes.
Common Outdated Wiring Types Found in Older Properties
Knob-and-Tube Wiring (1880s-1940s)
Identification: Ceramic knobs supporting wires, porcelain tubes through framing
Primary Concerns:
- No grounding conductor (increases shock risk)
- Single-strand insulation that becomes brittle over time
- Designed for open-air cooling—dangerous when buried in modern insulation
- Rated for 60-amp service maximum
Insurance Impact: Most carriers require replacement before providing coverage. Homes with active knob-and-tube may face policy denial or significant premium increases.
Professional Assessment: Thermal imaging can detect active knob-and-tube behind finished walls. Complete replacement typically costs $8,000-$15,000 depending on home size.
Aluminum Branch Wiring (1965-1973)
Why It Was Used: A copper shortage during the Vietnam War made aluminium an economical alternative for residential branch circuits.
Failure Mechanisms:
- Thermal expansion – Aluminum expands 30% more than copper when heated, loosening connections over time
- Oxidation – Exposed aluminum forms a resistive oxide layer at connection points
- Galvanic corrosion – Direct contact with copper terminals creates electrochemical reactions
Warning Signs:
- Warm outlet or switch plates
- Flickering lights on affected circuits
- Burning smell near electrical devices
- Discolored or melted wire insulation
Mitigation Options:
| Method | Effectiveness | Approximate Cost |
|---|---|---|
| CO/ALR-rated devices | Moderate | $15-30 per outlet |
| AlumiConn connectors | High | $25-50 per junction |
| Copper pigtailing | High | $40-75 per connection |
| Complete rewiring | Permanent solution | $4,000-$10,000+ |
According to the Consumer Product Safety Commission, homes with aluminum wiring are 55 times more likely to reach “fire hazard conditions” than homes wired with copper.
Frequent Electrical Problems in Vintage Homes

1) Overloaded Circuits and Breaker Trips
Root Causes:
- Too many devices on undersized circuits (15-amp circuits powering modern demands)
- Lack of dedicated circuits for high-draw appliances
- Aged breakers failing to trip at rated capacity
- Improper load distribution during additions or remodels
Modern Load Requirements:
- Refrigerator: 15-20 amps (dedicated circuit required)
- Microwave: 10-15 amps (dedicated circuit recommended)
- Home office: 15-20 amps for computers and equipment
- EV charger: 40-50 amps (requires 240V dedicated circuit)
If your breakers trip more than once monthly, your electrical panel likely needs load redistribution or a capacity upgrade.
2) Flickering and Dimming Lights
Diagnostic Checklist:
Isolated to one fixture → Likely loose bulb, failing ballast, or fixture wiring issue
Occurs when specific appliances run → Circuit overload or voltage drop from undersized wiring
Affects entire home → Main service connection problem or utility issue
Random and widespread → Loose panel connections, corroded neutral bus, or failing breaker
Professional voltage testing identifies whether fluctuations occur within safe operating range (114-126V for 120V circuits). Persistent voltage irregularities damage electronics and indicate serious system deficiencies.
3) Dead Outlets and Failing Switches
Common Failure Points:
- Backstabbed connections – Quick-connect terminals used in 1970s-1980s installations loosen over time, creating high-resistance connections
- Worn receptacle contacts – Decades of plug insertions weaken spring tension
- GFCI protection upstream – Hidden GFCI outlets in garages or bathrooms may protect downstream circuits
- Aluminum wiring oxidation – Creates invisible resistance at screw terminals
- Federal Pacific breaker failure – May appear “on” while providing no power
Professional Testing Protocol:
- Voltage measurement at the receptacle
- Circuit tracing to identify protection devices
- Infrared thermal scanning for hot connections
- Receptacle tension testing
Replacing a dead outlet without investigating upstream wiring often leads to repeat failures within months.
Critical Warning Signs Requiring Immediate Action
Burning Odors or Scorch Marks
What’s Happening: Electrical arcing produces temperatures exceeding 1,000°F—hot enough to ignite drywall, insulation, and wood framing.
Immediate Steps:
- Shut off power to the affected area at the breaker panel
- Do not use the outlet, switch, or circuit
- Contact a licensed electrician for emergency evaluation
- Consider turning off the main breaker if the source is unclear
Investigation Required: Thermal imaging, circuit testing, and inspection of panel connections and wiring insulation throughout the affected circuit.
Warm Electrical Components
Electrical components should never feel warm to the touch during normal operation. Heat indicates excessive resistance—the precursor to electrical fires.
Temperature Benchmarks:
- Normal outlet: Room temperature
- Concerning: Noticeably warm (90-110°F)
- Dangerous: Hot to touch (120°F+)
Thermal Imaging Data: Professional electricians use infrared cameras to detect hot spots invisible to human touch. Connections exceeding 140°F require immediate repair.
Why DIY Electrical Work Creates Liability
California requires permits for most electrical work beyond simple device replacement. Unpermitted DIY repairs create several risks:
Safety Hazards:
- Incorrect wire sizing causes overheating
- Missing grounding increases shock and fire risk
- Improper connections arc and fail prematurely
- Code violations compound existing problems
Legal and Financial Consequences:
- Insurance may deny claims for fires caused by unpermitted work
- Home sale complications when inspections reveal non-compliant wiring
- Liability exposure if electrical issues harm occupants
- Permit violations require costly remediation and inspection fees
Cost Comparison:
- Professional outlet replacement: $125-200
- Emergency repair after DIY fire: $5,000-50,000+
- Insurance premium increase after claim: 20-40% for 3-5 years
Licensed electricians carry insurance, understand local amendments to NEC (National Electrical Code), and ensure work passes inspection.
Benefits of Hiring Licensed Electrical Contractors
Certification and Expertise
California C-10 electrical contractors complete:
- 8,000 hours of on-the-job training
- Technical education in electrical theory and code compliance
- State examination covering safety, regulations, and advanced troubleshooting
- Continuing education to maintain current licensing
Electricians specializing in vintage home restoration bring additional expertise in outdated wiring identification, historical code research, and period-appropriate upgrade methods.
Comprehensive System Analysis
Professional troubleshooting evaluates:
- Service entrance and weather head condition
- Main panel capacity and breaker functionality
- Grounding and bonding systems
- Circuit load distribution and balance
- Wiring type, age, and insulation integrity
- Voltage drop across critical circuits
- GFCI/AFCI protection coverage
Insurance and Resale Value Protection
Home Sale Impact: Pre-listing electrical inspections identify issues buyers will discover anyway. Proactive repairs prevent:
- Last-minute price negotiations
- Deal failures during escrow
- Buyer requests extensive credits
- Listing stigma from failed inspections
Insurance Considerations: Homes with updated electrical systems often qualify for:
- Lower premium rates (5-15% reduction possible)
- Broader coverage options
- Easier policy approval and renewal
The Professional Electrical Inspection Process
Initial Consultation and History Review
Qualified electricians begin with detailed questions:
- Home age and construction details
- Known electrical modifications or additions
- Specific symptoms and their frequency
- Previous electrical work or inspections
- Future plans (remodels, EV charger installation, etc.)
This background identifies likely problem areas and informs testing priorities.
Visual Inspection and Documentation
Service Entrance Examination:
- Weather head and service drop condition
- Meter base security and corrosion
- Main disconnect operation
- Grounding electrode system
Panel Assessment:
- Manufacturer and model (identifies recalled brands)
- Physical condition (rust, heat damage, modifications)
- Proper breaker sizing and labeling
- Double-tapped circuits
- Adequate working clearance (NEC 110.26)
Circuit Evaluation:
- Outlet and switch condition throughout home
- GFCI protection in required locations
- Grounding system integrity
- Visible wiring condition in accessible areas
Advanced Testing and Diagnostics
Load Analysis: Measures actual power consumption and compares to panel capacity. Identifies circuits operating near or above safe limits.
Voltage Testing: Confirms stable voltage across all circuits. Detects neutral connection problems causing dangerous voltage fluctuations.
Thermal Imaging: Infrared cameras reveal:
- Overheating breakers and connections
- Hot spots behind walls indicate deteriorating wiring
- Unbalanced loads create heat buildup
- Failing components before visible damage occurs
Ground Resistance Testing: Verifies grounding system provides a safe fault current path (typically <25 ohms resistance).
Detailed Findings Report
Professional inspections conclude with written documentation, including:
- Immediate safety hazards requiring urgent repair
- Code violations needing correction for compliance
- Recommended upgrades for improved safety and capacity
- Optional enhancements for convenience and efficiency
- Itemized cost estimates for all work
- Permit requirements and inspection procedures
Electrical Panel Upgrades: Capacity for Modern Living
Identifying Undersized Service
Calculation Method: Total all connected loads (in watts), divide by voltage (120V or 240V), add 25% safety margin.
Example Modern Home Load:
- Central AC: 3,500W (15A @ 240V)
- Electric range: 12,000W (50A @ 240V)
- Dryer: 5,400W (24A @ 240V)
- Water heater: 4,500W (19A @ 240V)
- Refrigerator: 1,200W (10A @ 120V)
- Lighting and general use: 6,000W (50A @ 120V)
- Home office equipment: 1,800W (15A @ 120V)
Total demand: ~170 amps (requires minimum 200A service)
Panel Upgrade Cost Breakdown
| Component | Typical Cost Range | Details |
|---|---|---|
| 200Amp main panel | $800-1,500 | Includes breakers, labor |
| Permit and inspection | $150-400 | Required in Citrus Heights |
| Service entrance upgrade | $500-1,200 | If existing inadequate |
| Meter relocation | $300-800 | If required by utility |
| Subpanel addition | $600-1,200 | For additions or detached structures |
| Total typical cost | $2,500-5,500 | Varies by home specifics |
Benefits Beyond Capacity
Improved Safety Features:
- Modern panels include full AFCI/GFCI protection
- Better fault current handling
- Easier emergency shutoff access
- Clear labeling and organization
Future-Proofing:
- Capacity for EV charging (level 2 charger = 40-50A)
- Solar panel system integration
- Home additions without service concerns
- Smart home device expansion
Operational Improvements:
- Fewer nuisance breaker trips
- Stable voltage for sensitive electronics
- Balanced load distribution
- Reduced fire risk
Complete Home Rewiring: When Repair Isn’t Enough
Signs Complete Rewiring Is Necessary
- Extensive knob-and-tube or aluminum wiring throughout home.
- Deteriorated insulation exposing bare conductors
- Repeated failures despite targeted repairs
- Insurance company requirements for coverage
- Major renovation exposing walls and ceilings
Rewiring Process Overview
Phase 1: Planning and Permits
- Load calculation and circuit design
- Permit application with city building department
- Utility coordination for temporary service (if needed)
Phase 2: Installation
- Strategic wall/ceiling access points
- New copper conductors throughout home
- Expanded outlet and switch placement
- Dedicated circuits for major appliances
- Updated panel with proper capacity
Phase 3: Inspection and Completion
- City electrical inspection
- Testing and verification
- Wall and ceiling repair/restoration
- Final walkthrough and documentation
Investment Analysis
Complete Rewiring Costs (2,000 sq ft home):
- Basic rewire (minimal wall opening): $8,000-12,000
- Standard rewire (moderate access): $12,000-18,000
- Comprehensive upgrade (full modernization): $18,000-25,000+
Return on Investment:
- Insurance premium reduction: $300-600 annually
- Increased home value: $15,000-30,000
- Avoided fire damage: Priceless
- Peace of mind: Immeasurable
Most homeowners who complete full rewiring report the investment pays for itself through improved safety, reduced insurance costs, and increased marketability.
Energy Efficiency Improvements Through Electrical Upgrades
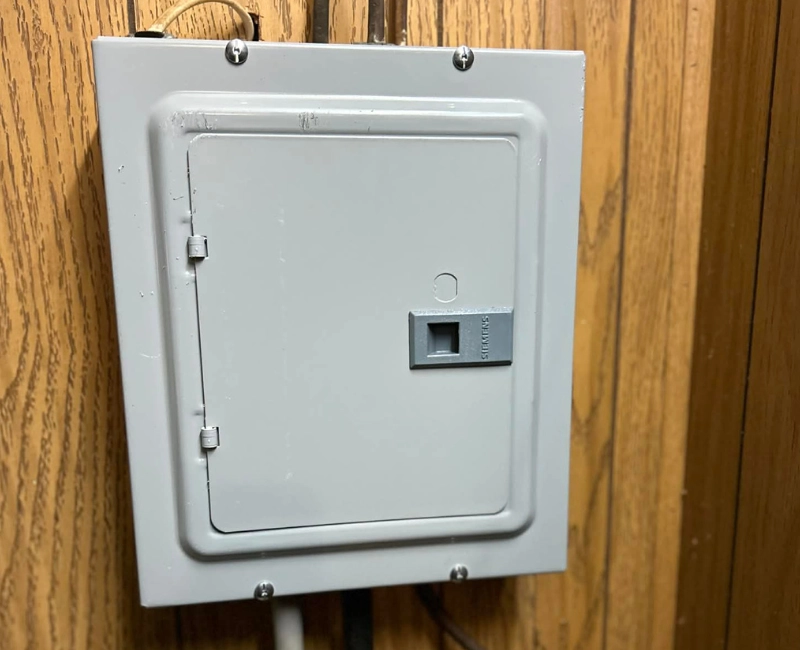


LED Lighting Conversion
Energy Savings Data:
- 60W incandescent → 9W LED = 85% reduction
- Average home lighting cost: $200-300 annually
- Post-LED conversion: $30-50 annually
- Payback period: 1-2 years
Additional Benefits:
- Reduced heat generation (less AC load)
- 25,000-50,000 hour lifespan vs. 1,000 hours
- Dimming compatibility without special fixtures
Smart Home Integration
Modern electrical upgrades enable energy-saving automation:
- Programmable thermostats (20-30% HVAC savings)
- Occupancy-sensing switches (reduce phantom loads)
- Load monitoring systems (identify energy waste)
- Time-of-use optimization (lower rates during off-peak)
Dedicated Circuit Benefits
High-efficiency appliances operate optimally on dedicated circuits:
- Refrigerators maintain consistent temperature
- HVAC systems avoid voltage fluctuations
- Electronics experience fewer power quality issues
- Appliance lifespan extends by 20-40%
Citrus Heights Electrical Code Requirements
California Title 24 Compliance
Citrus Heights enforces California’s electrical code with local amendments. Key requirements for older home upgrades:
GFCI Protection Required:
- All kitchen countertop receptacles
- Bathroom outlets
- Garage and outdoor receptacles
- Crawl spaces and unfinished basements
- Laundry areas
AFCI Protection Required (as of current code):
- Bedrooms
- Living rooms
- Dining rooms
- Family rooms
- Hallways and closets
Grounding Requirements:
- All outlets must include equipment ground
- Replacement receptacles must be GFCI-protected if no ground exists
- Metal outlet boxes require bonding
Permit Process in Citrus Heights
Work Requiring Permits:
- Panel upgrades or replacements
- New circuits or circuit extensions
- Service entrance modifications
- Recessed lighting installation
- Hardwired appliance connections
Permit Application Steps:
- Submit plans to Citrus Heights Building Department
- Pay permit fees ($75-300 depending on scope)
- Schedule rough-in inspection (before covering work)
- Schedule final inspection (after completion)
- Receive approval and documentation
Unpermitted Work Consequences:
- $500-2,000 fines when discovered
- Required remediation and re-inspection
- Home sale complications
- Insurance claim denials
Licensed contractors handle all permitting, ensuring work meets code and passes inspection on the first attempt.
Emergency Electrical Services: When Minutes Matter
True Electrical Emergencies
Call for Immediate Service:
- Sparking, smoking, or flaming electrical panel
- Strong burning odor from walls or ceiling
- Main breaker won’t reset after multiple attempts
- Electrical shock from appliances or outlets
- Water intrusion into electrical equipment
- Downed power lines contacting home
Can Wait Until Business Hours:
- Single breaker tripping occasionally
- One non-functioning outlet
- Light switch requiring extra force
- Dimming lights without other symptoms
Emergency Response Protocol
- Assess immediate danger – Evacuate if fire/smoke present
- Shut off main breaker – If safe to access the panel
- Contact emergency electrician – 24/7 services available
- Document for insurance – Photos if safely possible
- Avoid affected areas – Until professional assessment
Emergency Service Costs:
- After-hours service call: $150-300
- Diagnostic fee: $100-200
- Repair hourly rate: $125-200
- Weekend/holiday premium: 1.5-2x standard rate
Emergency repairs prevent catastrophic damage that costs thousands more than immediate professional intervention.
Preventative Maintenance for Long-Term Electrical Health
Annual Maintenance Checklist
Homeowner Tasks:
- Test all GFCI outlets monthly (push test button)
- Inspect cords for damage (replace if frayed)
- Verify outlet plates are secure and intact
- Ensure panel clearance remains unobstructed
- Check outdoor outlets for weather damage
Professional Tasks (every 3-5 years):
- Thermal imaging of panel and major circuits
- Tightening of panel connections (prevent oxidation)
- Load testing and redistribution
- Grounding system verification
- Voltage and amperage measurements
Warning Signs Requiring Immediate Inspection
Between scheduled maintenance, contact an electrician if:
- Any new burning smells appear
- Breakers trip more frequently than normal
- Lights begin flickering where they previously didn’t
- Outlets feel warm or show discoloration
- You hear buzzing from panel or outlets
- Ground fault indicators trip repeatedly
Choosing a Qualified Electrical Contractor
Essential Credentials
Verify Before Hiring:
- Active C-10 license (check at CSLB.ca.gov)
- Current liability insurance ($1M+ coverage)
- Workers’ compensation insurance
- Local business license
- Positive references from vintage home projects
Red Flags:
- Unlicensed “handyman” offering electrical work
- Pressure for immediate decision without inspection
- Significantly lower bids than competitors
- Unwillingness to obtain permits
- No written contract or warranty
Questions to Ask Potential Contractors
- How many years experience with homes from this era?
- What diagnostic equipment do you use?
- Will you obtain necessary permits?
- What warranty covers your work?
- Can you provide local references?
- What’s your approach to minimizing damage during rewiring?
- How do you handle unexpected issues discovered during work?
Cost Estimation Ranges
| Service Type | Typical Cost | Timeline |
|---|---|---|
| Basic inspection | $150-300 | 2-3 hours |
| Outlet replacement | $125-200 each | 30-60 min |
| Circuit installation | $300-800 | Half day |
| Panel upgrade (100A→200A | $2,500-5,500 | 1-2 days |
| Partial rewiring (5 circuits) | $3,000-6,000 | 2-4 days |
| Complete home rewire | $12,000-25,000+ | 1-3 weeks |
Request itemized estimates comparing multiple contractors. The lowest bid rarely delivers the best value; prioritize experience, credentials, and communication.
Conclusion: Protecting Your Investment Through Professional Care
Vintage homes in Citrus Heights offer character and craftsmanship modern construction rarely matches. But charm and safety aren’t mutually exclusive – they simply require attention to systems designed for a different time.
Professional electrical troubleshooting transforms aging infrastructure from liability to asset. Whether addressing immediate concerns or planning comprehensive upgrades, licensed contractors provide the expertise necessary to:
- Eliminate fire hazards before they ignite
- Restore stable power for modern demands
- Ensure code compliance and insurance approval
- Increase property value and marketability
- Provide decades of reliable electrical service
The cost of professional evaluation and repair pales in comparison to fire damage, insurance complications, or personal injury. Older homes deserve the same electrical safety standards as new construction; achieving that requires specialized knowledge and commitment to quality.
Schedule a comprehensive electrical inspection today. Your vintage home’s next chapter should be as safe as it is beautiful.